
Hey fellas, In this tutorial, you will learn how to create the pagination in Laravel API using the Laravel paginate.
If you don’t know the Laravel paginate. I recommend you to check the article I have written on Laravel pagination.
We will take the example of articles again in this tutorial.
To create or use pagination in Laravel API, we will start with setting up the Laravel, then updating the DB credentials, creating model, migration, and controller, and finally connecting the API route with the controller.
Let’s get started.
Table of Contents
Step 1: Install Laravel
You need to install Laravel. I am installing the Laravel in pagination_api folder.
composer create-project --prefer-dist laravel/laravel pagination_apiStep 2: Update DB Credentials & run server
In this, I will update the DB credentials in env file and start the server by using the following command:
php artisan serveStep 3: Create Article model and its migration
Let’s create the Article Model and its migration. I will be using -m flag for creating Article migration.
php artisan make:model article -m
Step 4: Update the migrate function and run migration
Let’s modify the Article migration up function in database/migrations/create_articles_table.php to add the title and description.
Schema::create('articles', function (Blueprint $table) {
            $table->id();
            $table->string('title');
            $table->string('description');
            $table->timestamps();
        });
Now let’s run the migration:
php artisan migrateStep 5: Add the fake articles
You can skip this step if will add the data manually in the table.
I am using the seeders to add the dummy data. So open up the seeders/DatabaseSeeder.php and update the run function to have the following code:
$faker= Faker::create();

        foreach (range(1,100) as $index){
            Article::create([
                'title'=>$faker->sentence(6),
                'description'=>$faker->paragraph(1),
            ]);
        }
We are using Faker to add the dummy title and description in the Article Table. 'title'=>$faker->sentence(6) will add the 6 words as the title and 'description'=>$faker->paragraph(1) will add 1 sentence as the description. We are adding 100 articles by doing that.
Make sure to include the use App\Models\Article; and use Faker\Factory as Faker; in the header as well.
To generate the data run command:
php artisan db:seed
Step 6: Create Controller
Run the following command to create ArticleController.
php artisan make:controller ArticleControllerPlace the following code in the ArticleController.
<?php

namespace App\Http\Controllers;

use App\Models\Article;
use Illuminate\Http\Request;

class ArticleController extends Controller
{
    //
     public function get_data(Request $request){

        $per_page=10;
        if($request->has('per_page'))  $per_page=$request->per_page;

        $json['code']=200;
        $articles = Article::paginate($per_page);
        $json['articles']=$articles;
        return Response::json($json);
    }

}
In the get_data function, I have set the per_page limit to have 10 articles per page, if the per_page parameter is not passed. If you want a custom number of articles per page, then you can pass the per_page parameter in the URL.
This is how your URL will look like when you are calling the API Request:
http://localhost:8000/api/get_data?page=2&per_page=20To load the desired page data, you need to pass the page the parameter in URL.
As you can see we don’t have to handle or use the page parameter in the get_data function as it automatically gets passed to the paginate function, so we don’t need to do anything.
Step 7: Create Route
Now let’s create the route in routes/api.php file.
Route::get('get_data',[\App\Http\Controllers\ArticleController::class,'get_data']);
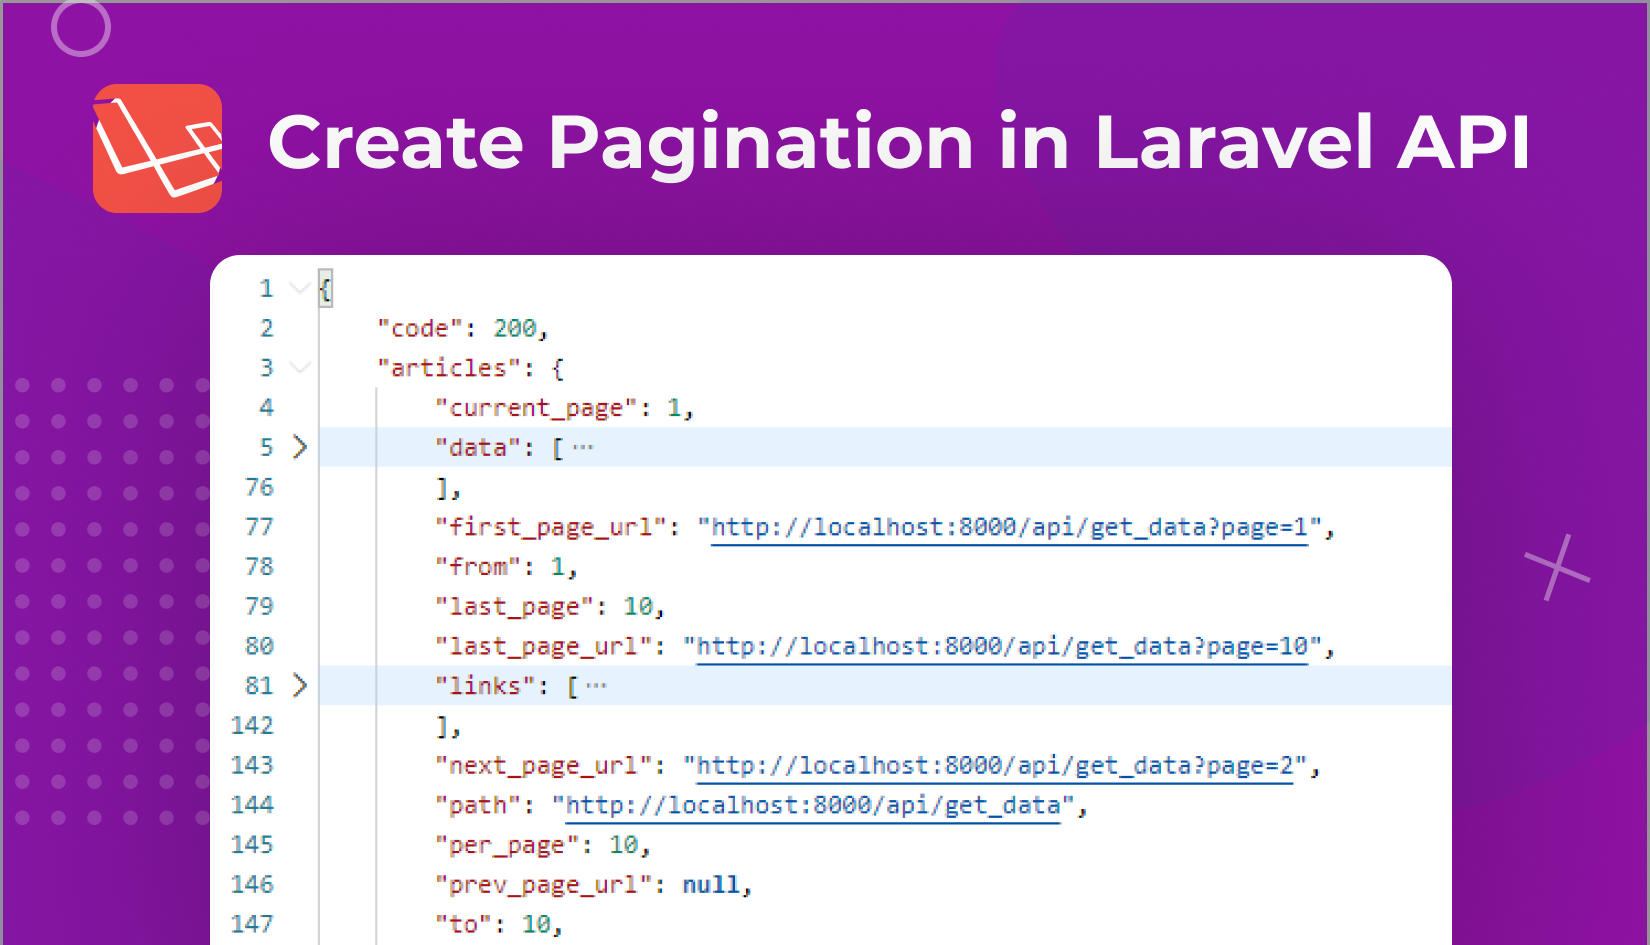
Now if you type in browser http://localhost:8000/api/get_data, you will see data like this.
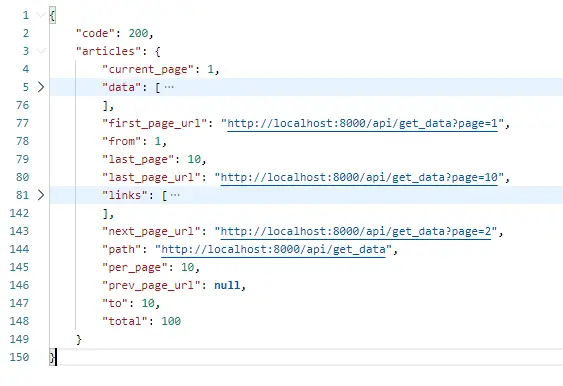
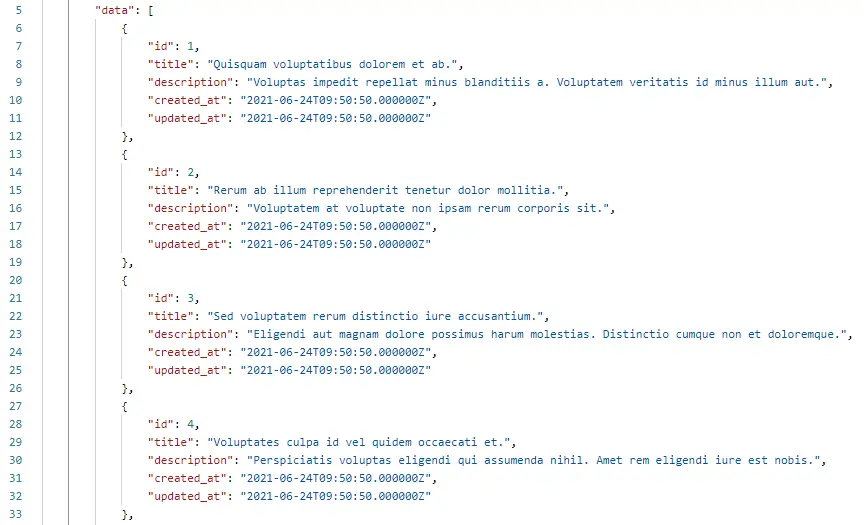
The data variable contains articles for the first page.
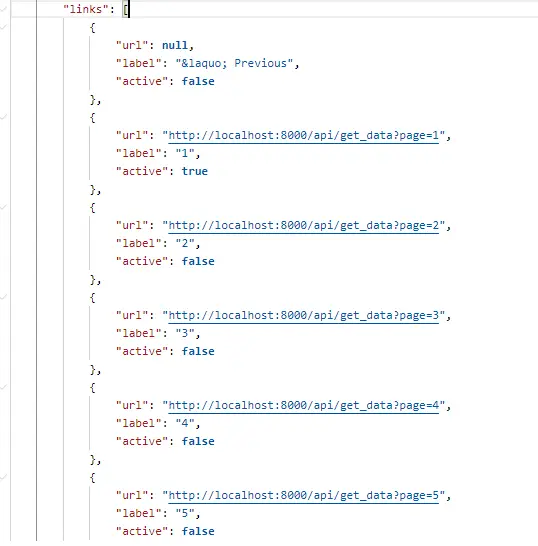
And links variable contains all the links and its label for the available pages.
Conclusion
Great, you have just reached the end of the article for creating or using Pagination in Laravel API.
Hope you have learned something new today
Let me know if you have queries in the comments.
See you in the next one 🙂

Write a Reply or Comment